Processing#
dBWav quickly analyses long-duration hydrophone recordings in real time. This is made possible by ‘pre-processing’ the recorded data and storing the results in a much smaller data file called an LVX file. The LVX file contains overall levels, statistical parameters and frequency data at a time window and frequency range specified by the user. Some high-resolution time-based information cannot be stored in the LVX file (for example FFT results) as this would significantly affect the file size and real time analysis. Instead, dBWav refers to the original .wav file to calculate these results as needed.

Setup#
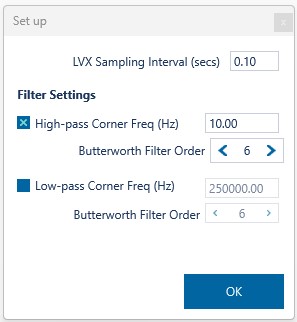
To begin, select Setup located in the top-left of the dBWav main window. Here you can select the parameters for the LVX file.
A sample period can be entered, with 0.1 seconds being the smallest period.
You may choose to apply a high-pass and low-pass filter to the wav files. The corner frequencies and orders of the filters can be set.
Once you have entered in your settings, click ok
Process#
The next step is to process the raw audio files. For this example, we are processing Ocean Instruments Sound Trap hydrophone files. Transducer name and time stamp information are read directly from the file name.
Select Process. Navigate to the raw audio files that you would like to process.
Select your files. Multiple files can be selected for batch processing. Once they have been selected, click open.
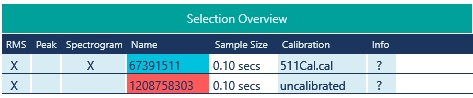
A summary of the new LVX files will show up in the Overview tab once the processing has completed.
Calibration#
The next step is to calibrate the LVX files. Click Calibrate located in the top left, and a dialog box will pop-up.
There are two methods to creating a calibration file.
Signal Calibration#
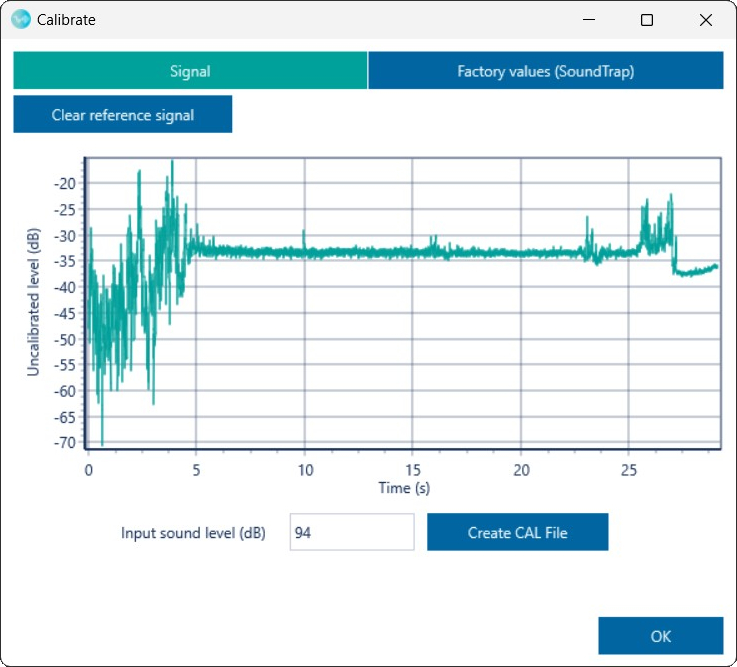
The first calibration method requires a recording which contains a calibration tone at a known level.
Click load reference signal and navigate to the calibration tone recording.
Select the recording and click open. Click and drag to select the time period containing the calibration tone, and enter in the known calibration level.
Click Create CAL File and a message will appear to show where the file has been saved./ /
SoundTrap End-To-End Calibration#
The second calibration method is specifically for Ocean Instruments Sound Trap hydrophones. Navigate to the calibration tab on Ocean Instruments’ website and enter in the device serial number. Here you will find the End-To-End calibration value
Go back to the Calibration window and click 'Sound Trap End-to-End'.
Enter in the End-To-End calibration value from the website
Click Create CAL File and a message will appear to show where the file has been saved.
System specifications Calibration#
The sensitivities and gains of the separate components of the hydrophone recording system can be entered under the System Specifications tab.
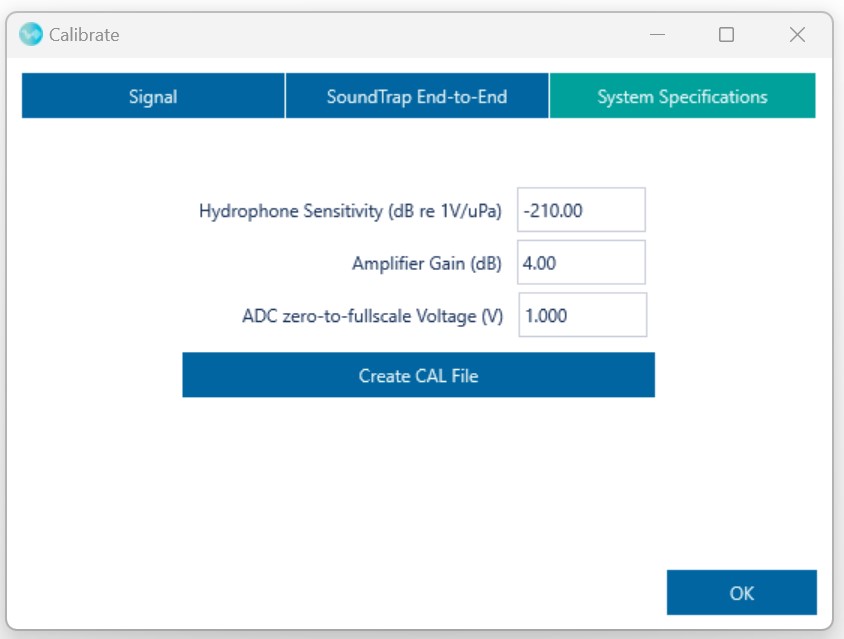 These are the hydrophone sensitivity (dB re 1V/uPa), amplifier gain (dB), and an ADC zero-to-full-scale voltage (which is the voltage that gives the maximum digital output - note that dBWav normalises the maximum digital output to 1.0).
Again, click Create CAL File and a message will appear to show where the file has been saved.
Apply calibration to LVX#
Now we need to apply the calibration file to the LVX file.
Located in the bottom left in the Overview tab, you will see the that the LVX files say “uncalibrated”. Click the “uncalibrated” text.
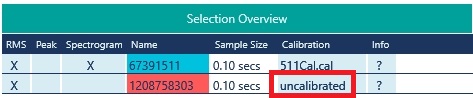
Selected the calibration file you would like to apply to the LVX file, and click open.
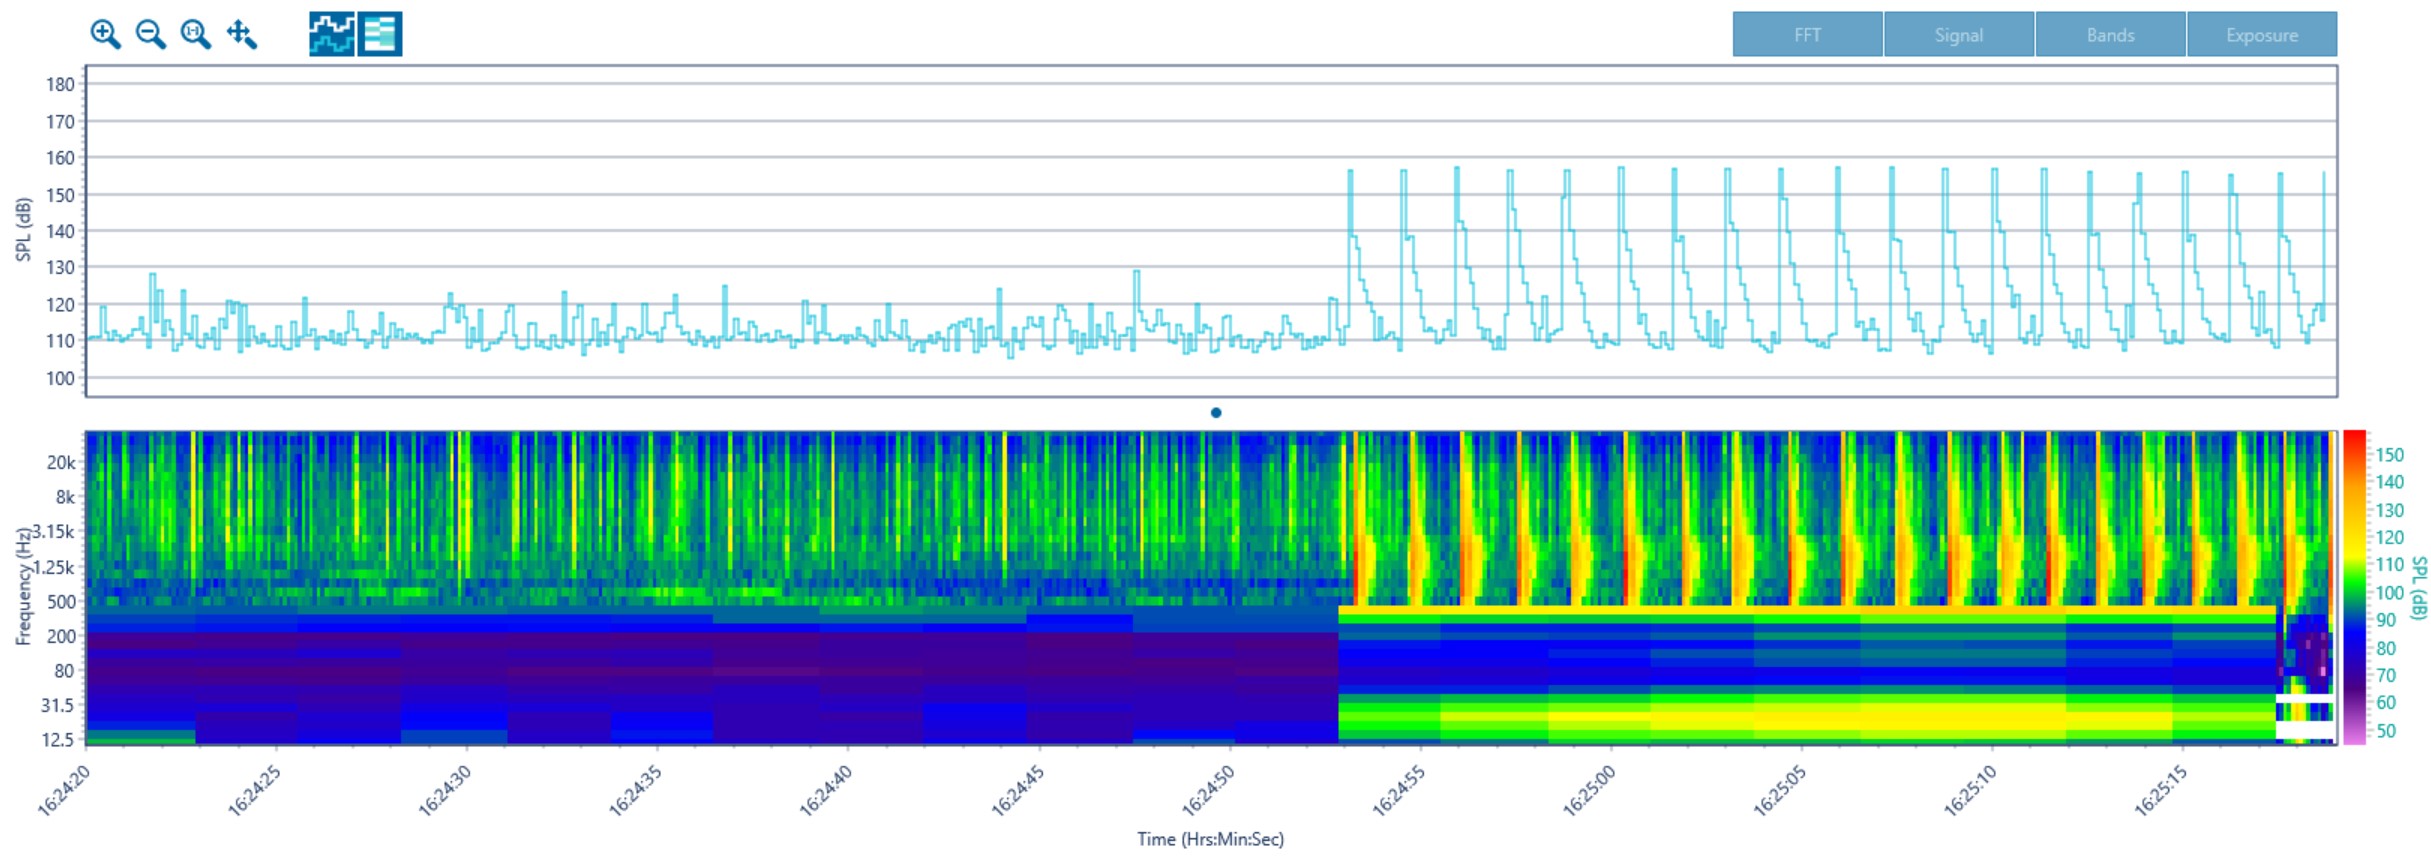
Once an LVX file has been calibrated, a time-trace will be shown on the chart on the main window. If the time-trace does not appear, click the refresh button in the top left to centre in on the measurement period.
The time-trace is a plot of sound levels across the duration of the raw audio file. The trace shows a sound level for each sample period using the value entered in the Setup window. In this example, the sample period is 0.1 seconds.
Open#
After a wav file has been processed and a LVX file generated, you can now go back and open the LVX file for future analysis.
Clear#
To remove the LVX files from memory, click Clear.